Wednesday, January 29, 2014

Some "Fresh Brewed" News!!!

Well happy Wednesday everyone...actually that was the title of my very first post...LOL!

A post two days in a row!!! 

Today I have some exciting news to share!! 

I've been asked to be on the Fresh Brewed Design team and today the LOVELY Heather will be announcing us nubbies!!!

Heather's designs are called "Fresh Brewed"...well because they are freshly brewed from Heather's creative mind!!!

I chose one from Fresh Brewed's Alice in Wonderland collection because they intrigued me...I was also POSITIVE that I had some Alice in Wonderland themed paper in my craft room.  Well after an exhaustive search that paper was nowhere to be found...did I image that I had it or was it sucked into the black hole of my ever expanding craft room...that is the mystery!!

Anyway I went to "Plan B" and used some GORGEOUS Graphic 45 paper from the "Once Upon a Springtime" collection...
 
I made it into a window style card using a Go Kreate die...
please click on the first image for a slideshow and closer view...
 this is Heather's "Drink Me" digi from her Alice in Wonderland collection...
 I decided to make this a tea party as I found this cute little tea pot charm in my stash...
the sentiment is computer generated...
 I added some ribbon, crown stick pins, pearls, flowers and of course...Frantage...
just a little...tee hee...

So that is my first "Fresh Brewed Design" DT card...I hope that you will hop on over to the Fresh Brewed Design Challenge blog and check out the work of my other new team mates!!!  I had so much FUN with this image!!

Materials Used:
DP-Graphic 45 Once Upon a Springtime 8"X8" paper pack
Die-Go Kreate XXL Frames Flower #1 #360020
Crown stick pins, pearls and flowers-Wild Orchid Crafts
Punches-Fern punch-Martha Stewart and Small Tag punch-Marvy
Charm and ribbon are from my stash

Until next time...your visits and comments are so very much appreciated!!!

Tuesday, January 28, 2014

Happy Birthday to a "Vintage" Friend!!!

Hello dear friends!!

Hope that everyone is keeping well...today we have a sunny day and even though it is cold and windy I find that the presence of SUN just makes everything seem so much better!

Today I would like to show you a birthday card that I have made for a long time friend...hence the "Vintage" in the title!!  I know that she won't mind me calling her "Vintage" as she is like a fine vintage wine...she just gets better with age...LOL!!!

I also found myself gravitating to the vintage look...Fussy and Fancy is having a "Vintage" Challenge right now and after scrolling through all the lovely projects that have been posted so far I found myself inspired!!  I didn't get to contribute to this one as it's not our team's turn...AWE...but I have to tell you that the contributions by Team A are just PHENOMENAL!!I hope that you'll pop on over to check out all of the projects that have been posted both by the DT and our fabulous followers!!!  And if you haven't contributed yet you have to join us as our sponsor this challenge is the FABULOUS Live and Love Crafts!!


Okay so here is my card for my dear friend Debbie...

just a warning...this is a picture heavy post...AGAIN...
I made the card in a book style with tabs and a "book marker" with blue seam binding and attached a zipper charm (the one with BEAUTY written on it) that moves to mark pages...
I added the vintage lace with rhinestones to the front and back covers...
and pearls along the edge and on the tabs...
 a closer look at the front...the top sentiment is a Whimsy stamp...
Happy Birthday is a Hero Arts stamp...words stamped and cut out separately using a Sizzix /Hero Arts die/stamp set...
 this is Tilda with Vintage Outfit from the LCM13 collection...
the sentiment is computer generated...
 I masked the Tilda with Magnolia Chicken Wire stamp (sorry not sure of collection)...
I was experimenting with a different background look...
 Tilda in Evening Dress LCM13 collection masked with Tilda Dressing Table LF14 collection...
sentiment computer generated...
 and a closer look...
this is Elephant Show Tilda from the LCM13 collection masked with Rose Package from LF14 collection...
sentiment computer generated... 
 a closer look...
 and this is the final page with my birthday wishes to her...
I am going to add a pocket for a gift card on the blank page...
 
 
So that is my "Vintage" birthday card!!!
 
Materials Used:
DP-Magnolia-Vintage Paper Pack-Magnolia-licious
Stamps-Magnolia (all named above) and Whimsy Sentiments-Magnolia-licious
            -Hero Arts Sentiments
Dies-Spellbinders Classic Ovals and Just Rite Custom Dies Vintage Labels Four
       -Sizzix/Hero Arts #657775
       -Magnolia Doo Hickeys Peaky Floral Tabs WL13 collection
Lace, zipper charm and Frantage-Live and Love Crafts
Flowers, bead clusters, seam binding and pearls-Wild Orchid Crafts
 
Challenges I will enter:
Magnolia-licious-"Anything Goes"
Marvelous Magnolias- #60 "Pretty Pearls"
Midweek Magnolias- #81 "Winter Blues"
Totally Tilda-#88 "Masking"
Time for Magnolias- #44 "Wear Something on their Head or in Hair"
 
Until next time...your visits and comments are so very much appreciated!!!


Saturday, January 25, 2014

Puttin' on the Spritz!!

Welcome to a rare Saturday night post!!

Recently I have rekindled my love for House of Mouse stamps...my very first stamp was actually a House of Mouse cutie!!!  This has come about due to my visits on Sue Drees blog "Sue's Rubber Stamping Adventures"...Sue has inspired me with her AMAZING cards!!  Then I finally put it together that I had been receiving Monday Feed Blitz e-mails from Buffalo Stamps and Stuff with Sue as the main artistic contributor!!!

Anyway here is my card using a House of Mouse that has been sitting in my drawer for years and never used...AWE! 

When I was trying to decide on a name for my post the first thought that came to my mind was "Puttin' on  the Spritz"...then I looked at the name on the stamp and would you believe that that was actually the name...LOL!!!! 


Well here is my card...
           I stitched the layers of cardstock together...
                                       click first picture for slide show ...                               


close up of the tags with sentiments from LOTV and a glass tube that I put beads in...


this is "Puttin' on the Spritz"...I added some gingham ribbon to look like a skirt...

flowers, butterfly charm, lace with rhinestones and chiffon ribbon...
and of course Frantage...
 
So that is that for "Puttin' on the Spritz"!!!  I'm just loving these little darlings...they are just so cute!!
 
Materials Used:
DP-Maja Design Paper Vintage Spring-Live and Love Crafts
Stamp-House of Mouse "Puttin' on the Spritz" and Sentiments stamps-LOTV
Die-Go Kreate XXL Frame Flower #1
Rhinestone lace, butterfly charm, gingham ribbon and Frantage-Live and Love Crafts
Chiffon ribbon, pearls and glass tube are from my stash
 
Challenges I will enter:
House of Mouse-Challenge #161-"Use a stamp you've never used before"
Gruffies and Guests-Challenge#1-"Anything goes"
Sweet Stampin-"In Stitches"
 
Well until next time...your visits and comments are very much appreciated!!!


Thursday, January 23, 2014

A Shared Passion-My First Shared Post

Well hello everyone!!!

It has been almost two weeks since my last post...I find that I am still fighting off the affects of whatever bug that I had at the beginning of January!!  It's just the fatigue end of it...after I  take care of work and home chores I just don't have the energy to craft!  The ideas are there but the body just does not want to co-operate...LOL!!!

So that has brought me to today's post!  I have had this idea swirling in my head for awhile and thought...this is the perfect time to begin!!!

I think that any of you who visit me on my blog have probably figured out that I have a PASSION for "Explosion Boxes"!!!  Well today I am going to show you my very first one that I have never posted but as it was already done it was the perfect time to do so!!  I made this almost a year ago!!

And the result of my first attempt at an "Explosion Box" was the planting of the same passion in my oldest Granddaughter's crafty mind!!

So I'll begin with mine and a warning that this is a VERY HEAVY picture post...
please click on the first image for a slide show...
 the front view with oval cut out window...
 
 the lid using an acrylic flower as knob...surrounded by fabric flowers, paper leaves, fern branches and a couple of feathers...
 
 the two sides are made the same with a small flower arrangement in the bottom back corners...
 the back has lace threaded with ribbon matching up with the lid...
 inside the centre I made a tree out of the Memory Box Arboscello Tree (cut out about six times) put through the Zyron and formed together...I added a bit of Glamour Dust...
tree trunk was made using a Tim Holtz wood grain embossing folder then cut into shape...
the grass/ground area was made using green tulle/bead clusters and burlap ribbon formed
into clumps then I added some punched butterflies, flower wire tendrils and pearls...
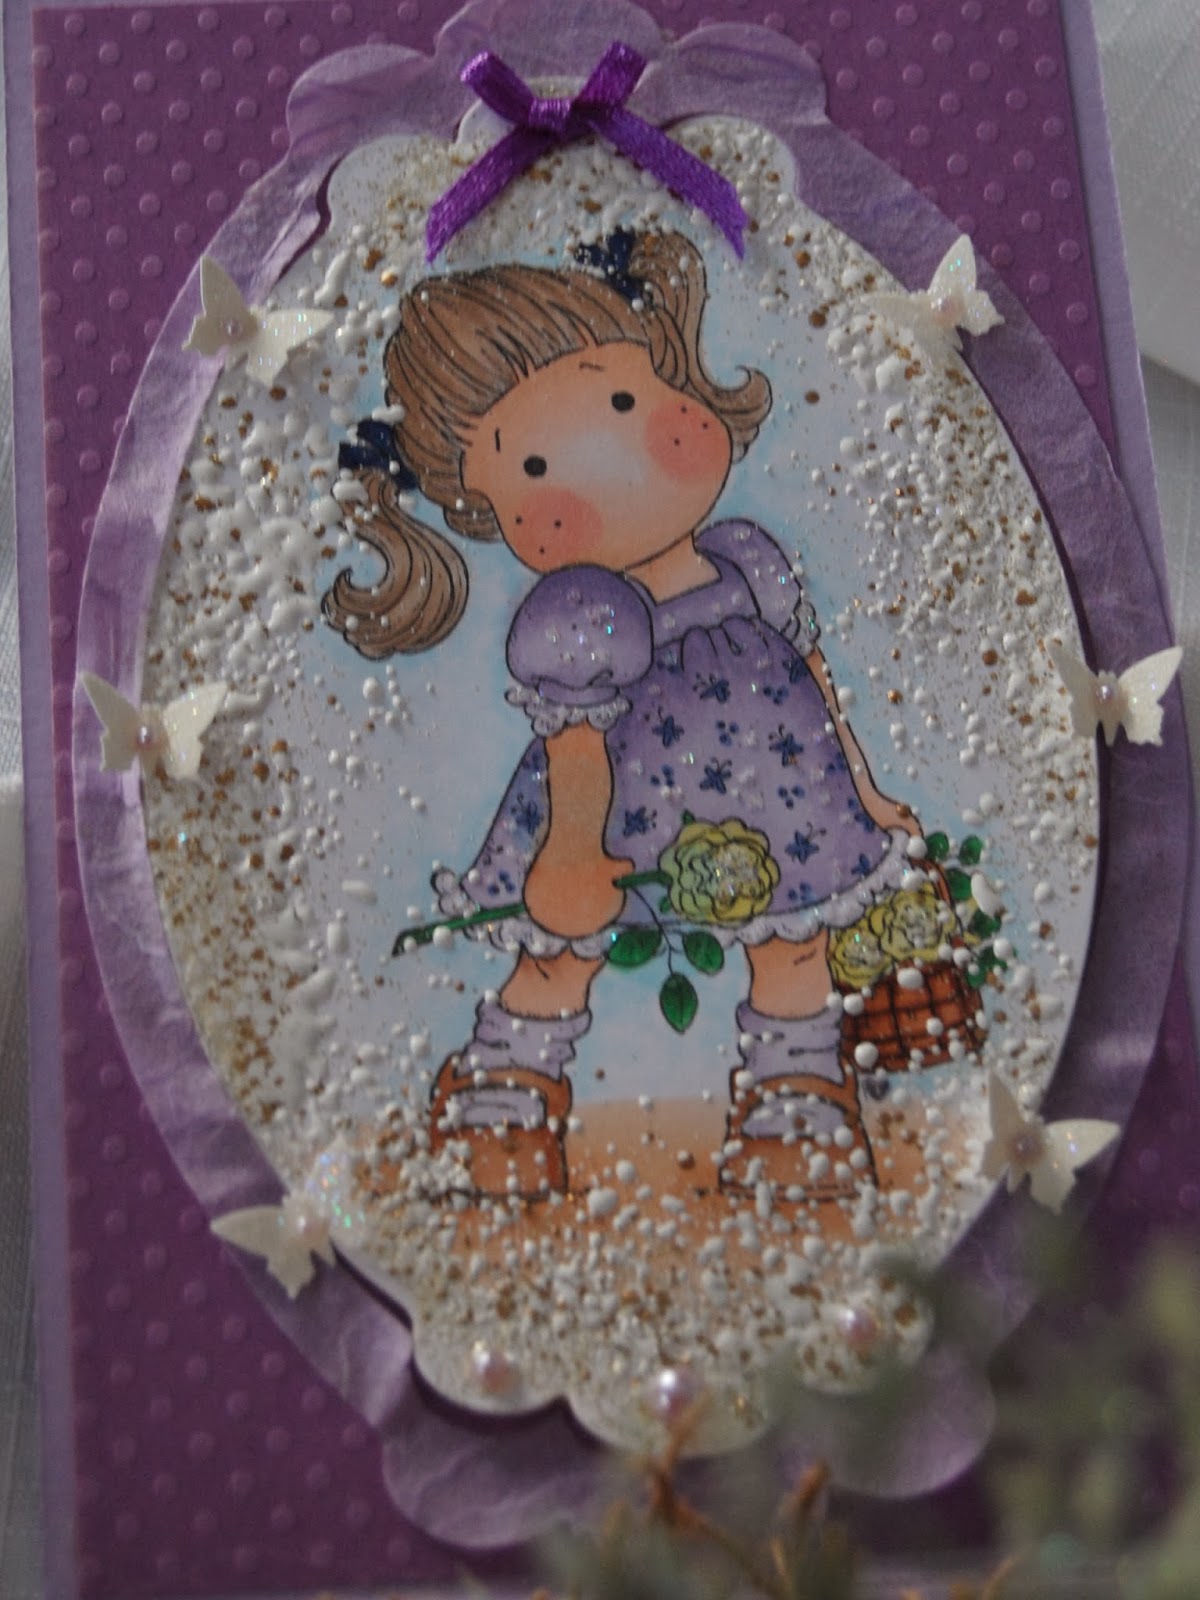
the stamp is Seeding Tilda from the Sweet Rainbow 2011 Collection..
Happy Spring Tilda from the Butterfly Dreams 2011 Collection...
OH and while I told myself not to change anything after a year...
I looked at it and thought that the images looked naked...so my Frantage loving voice won out and I just HAD to add some...
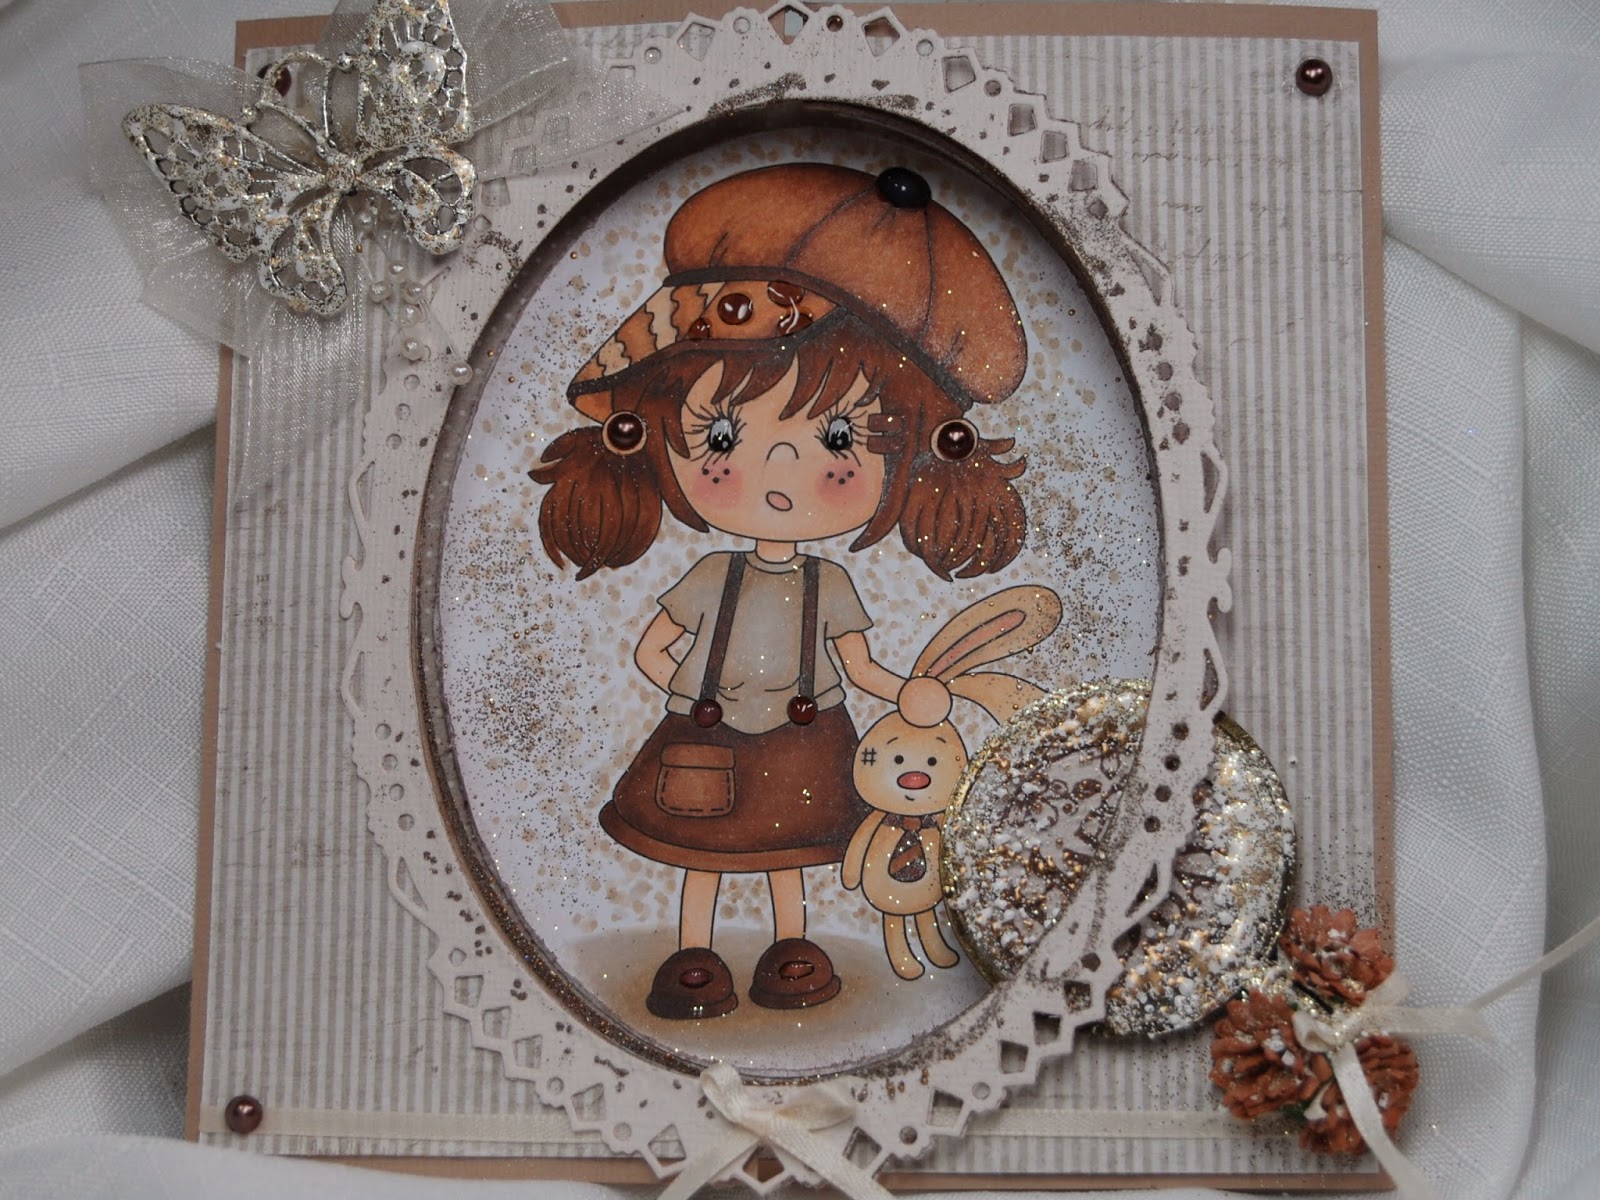
Tilda with Butterfly Dress from the Butterfly Dreams 2011 Collection...
 
and this picture just WOULD NOT co-operate and turn for me...
this is Hello Little Butterfly (not sure what collection)...
 and full view of the "exploded" box...
 
So after showing this to my Granddaughters, our illustrious Calla (she would have been only five at the time)...

 got down to work while at her Nanny and Granddad's (my Granddaughters' other Grandparents) cottage and came up with this BEAUTIFUL "Explosion Box" all by herself...
their Mother Sarah told me that she went off by herself and came back with this MASTERPIECE and told them she had wanted to make an explosion box "Just like Grandma's"...
needless to say when my Son sent me this picture I was bursting with PRIDE...
I asked Calla if she would like to be on a blog post with me and she emphatically said "YES!!"...
below is Calla's box exploded with water and a LOVELY handmade swan swimming...
she even made a front window!!!...
SORRY Calla...Grandma's computer was acting up and I couldn't get your explosion box picture to go any bigger...
when I asked Mia (also five at the time of this picture) if she wanted to be on my blog doing a craft she said "No" so I asked if she wanted to be the dog whisperer and she said "YES!!"...
our Mia says she wants to be a vet when she grows up!!!...
 
Well that ends my "First Shared Post" featuring a shared passion with my BEAUTIFUL and GORGEOUS twin Granddaughters!!!  The pictures of the girls were taken almost a year ago at about the time that Calla made her WONDERFUL creation!!!!
 
Materials Used: (please forgive me if I forget to mention a few...it was almost a year ago)
DP-LOTV (I forget which collection)
Stamps-named above are from Magnolia-licious
Fratage-Shabby White Live and Love Crafts
Dies-Spellbinders Classic Ovals, Scalloped Ovals and Labels Ten
         Memory Box Arboscello Tree, Tiny Tendrils and Macarena Corner
         Poppy Stamp Die is Ivy Tendrils
Ribbon, lace, pearls, flowers, acetate, tulle/pearl clusters and burlap are all from my stash
 
Challenges I will enter:
Fashionista Challenge-Challenge #5 Anything Goes
Magnolia Down Under-#227 Summer Delights
Tilda's Town-Challenge #88 Anything Goes
 
Until next time...thank you so much for dropping by...your visits and comments are very much appreciated!!!!


Saturday, January 11, 2014

Christmas 2013 Completed!!!

Good Saturday Morning!!!

I have FINALLY completed all my Christmas "cards" for special friends!  And I have learned a very valuable lesson...START EARLY...LOL!!!!!!

You know when you think "That's okay I can finish it tomorrow or the next day"... well after all the obstacles that crossed my path before Christmas...and after...I have decided that I am going to start soon on my Christmas 2014 projects!!!

I had left completing "cards" for my two best friends till the end because...hey they're my best friends and they'll understand...plus I wanted to make theirs' special!

Today I'd like to show you the final one and I have to warn you that my post is picture heavy...

 
this is an Explosion Box of a different sort then what I usually do...
I saw this on the Buffalo Stamps and Stuff Feedblitz that I receive and thought...
WOW I'd really like to try this...
this is the front of the box with slit cut diagonally from near the top to near bottom...
please click on the first picture for a slideshow...


 a closer look of a darling House of Mouse stamp...Light Fun Amanda...
I cut it into a 3" circle and mounted it onto a sewing machine spool...
then I made sort of a hook using ribbon...
when you unloop the ribbon from the flower the whole circle spirals to the bottom of the slit ...like a snow ball rolling down a hill...
 the two sides are decorated on just one corner each with a flower cluster... 
 this is the back using Light Hanging Muzzy...
 and a closer look...
the lid using a metal flower and brad as a knob and decorated with silver and pink ribbon...
 the box opened up with a tray to place my BFF's gift...
on the back of the sewing machine spool I fastened another circle and then used
Magnolia's View Master die cut and wrote Merry Christmas in the cut out spaces...
 and the final image is Wishful Thinking Monica...
 and a closer look...
PHEW!!!!  DONE!!!  Oh and I dusted off my Prismas and used them!  I have to tell you that I need lots of practice still with these!!!
 
Materials Used:
Stamps-House of Mouse Light Fun Amanda #HMKR1021, Light Hanging Muzzy #HMUR1046 and Wishful Thinking Monica #HMJR1030
DP-Heidi Grace
Die Cuts-Magnolia View Master, Go Kreate Frilly Sq. #8 #120028
Punch-Marvy 3" circle
Frantage-Shabby Pink and Shabby White are from Stampendous
Ribbon, sewing machine spool, brads and metal flower are from my stash
 
Challenge I will enter:
House of Mouse Challenge HMFMC#160-use silver (ribbon, metal flower and silver paper) and/or gold (throughout the DP and in the Frantage)

So that is that for today!!

Thank you so much for taking the time to stop by...your visits and comments are very much appreciated!!


Friday, January 10, 2014

Fussy and Fancy Challenge #105-Monochromatic

Good Friday Morning!!

Hope everyone is fairing okay with all of this tumultuous weather that we are experiencing!! In Southern Ontario we have had quite a bit of snow, frigid weather, high winds and hey guess what...on the weekend above normal temps and...yes RAIN!!  But with all that said we are much more fortunate than many who are experiencing the flooding, excessive snow and severe freezing temps!!

But enough about weather...I'm here to tell you that today starts the first Fussy and Fancy Challenge of 2014!!!   Challenge #105 is...Monochromatic!  Our sponsor for this challenge is Crafty Sentiments!

So I chose to use a Crafty Sentiments digi called "Harriet and Ragga"...she's a little cutie!!

Here is what I came up with...

I created a "window" by cutting out the center using Spellbinders Grand Calibur Ovals and  framing it with Spellbinders Grand Calibur Decorative Ovals One...
please click on the first picture for a slideshow... 


and this is little Miss Harriet (I added eyelashes with a black Zig pen) with her pal Ragga...I added a touch of Frantage on the oval matt and to the chain connecting the two sentiments...
 
and some more Frantage to a metal butterfly...
 
and yes...to a magnifying glass and small flowers...

And that is that for my contribution to this Fussy and Fancy Challenge ...you're in for a real treat when you check out my teammate's works of art !!  Hop on over to our Challenge Blog and join in the fun...we would LOVE to see what you create!!!

Materials Used:
Stamp-Crafty Sentiments "Harriet and Ragga"
Sentiment stamps-LOTV Set #58 Pretty Grungy-Good Times
DP-Maja Designs Vintage Spring Basics 6X6 pads-Live and Love Crafts
Flowers-Wild Orchid Crafts 
Frantage Shabby white and Shabby Taupe-Live and Love Crafts
Metal butterfly-Ribbon Girl
Metal chain and Magnifying glass-Tim Holtz
Ribbon and pearls from my stash

Thank you for taking time to stop by...your visits and comments are very much appreciated!!


Friday, January 3, 2014

Christmas "Card" Undelivered!!

Well Happy New Year All!!  I hope that everyone was able to enjoy quality time with family and friends!

Our Christmas was a little wacky this year and I was unable to finish and deliver my "cards" for my two best friends!!

Today I want to show you my friend Dianne's who has been my BFF forever...literally as she has known me since I was born!  Di has a pink Christmas tree (not the tree...the ornaments) so I decided to make an ornament using white/pink/a touch of red...
 

I used a large glass ball that I found in Homesense...I added White Texture Effect and glamour dust to create the snow on top...
please click on first picture for a slideshow...
 
I made a Christmas tree by forming a cone with white card stock and covering it with white feathers...
 
I topped it with two snowflake charms back to back and added pink pearls and some tiny red rhinestones...
 
then I made gifts out of cardstock for Tildas to sit on...
 
this is Tilda with Little Rudolph (this is one of my most favourite Magnolia stamps) from the Christmas Story 2012 collection...
 
here is Jolly Elf Tilda...I believe she's from the Merry Christmas 2010 collection...

 
and this is Tilda with Little Gift...sorry not sure what collection... 
 
 
And that completes Dianne's "card" which I will give to her today...so now I just have one left to do...then I guess it's time to start 2014 cards...LOL!!!
 
Materials Used:
Glass ball-Homesense
Stamps-all listed above were purchased from Magnolia-licious
Snowflake charms-Ribbon Girl
Feathers, pearls, rhinestones, ribbon, glamour dust, fake snow-from my stash
White Texture Effect-Martha Stewart

Challenges I will enter:
Magnolia Mania-Challenge # 82 Gifts
Simply Magnolia-Favourite (Tilda with Little Rudolph) or Newest Magnolia
Time for Magnolia-Christmas Challenge #42 Winter Wonderland
Midweek Magnolia-Challenge #79 White Christmas
Tildas Town-Challenge #85 Anything Goes

Well until next time...thank you so very much for taking the time to stop by!!  I really do appreciate your visits and comments!!!